Designing heating systems with convective radiators
| Product | InstalSystem 5 |
| Type of article | DESIGNING LESSON |
| Source for translation | 2023-03-16 |
Scope of lesson
The article presents the method of designing a heating system with convector heaters from the source to terminal units, inclusive of complete control and balancing.
Modules and program configuration
- InstalSystem 5 package containing the module:
- Heating systems
- Radiators sizing
The videos present the topics described in this article, but they aren’t a recording of this lesson.
Project file
The project file used in this lesson: Convective heating installation with radiators in residential building (example for the lesson).
Inital state
A design that includes the structure of the building (storeys, rooms). The values of design heat load of rooms are defined for heating.
Steps to perform
Opening initial state file
- Launch InstalSystem 5.
- Open the project. For more information, see: Project and application management.
Defining catalogues and general data
Fill in the default data in the General data window:
- Project scope - determine project scope: Heating systems.
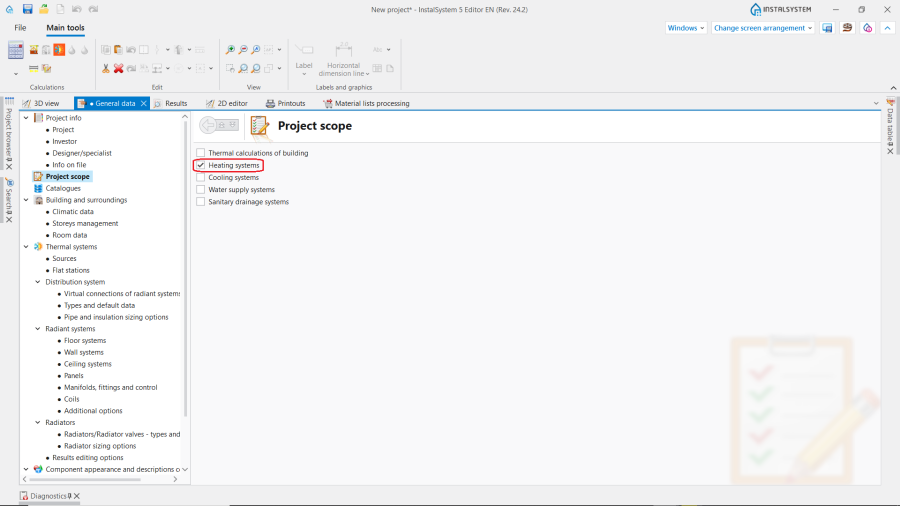
1. Project scope. - Catalogues – select and move necessary catalogues to the Catalogues in project: table. To speed up the selection, the filters can be used. For more information, see: Using catalogues and catalogues data in the project.
- Storeys management – for each storey verify and set basic parameters:
- Distance between windowsill and floor (Hs),
- Default distance of pipe-runs (except for supplying ceiling panels) from the floor specified in storey data: S - supply, R - return (ΔHpipe-run,,S and ΔHpipe-run,, R).
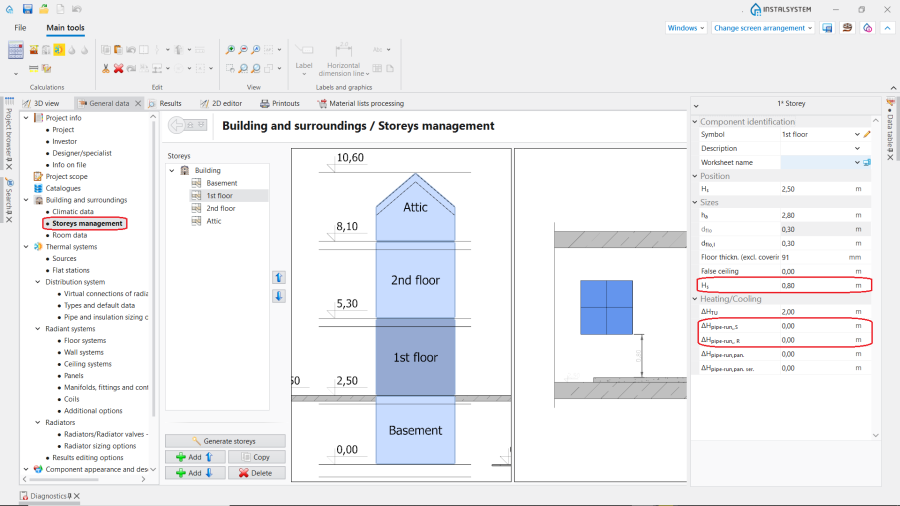
2. Storeys management.
- Thermal systems / Sources – verify default parameters for the heating source.
- Thermal systems / Distribution system / Types and default data – append default types:
- Default pipe types and insulation,
- Default valve types,
- Default types of fittings and manifolds,
- Verify Hydraulic regulation options.
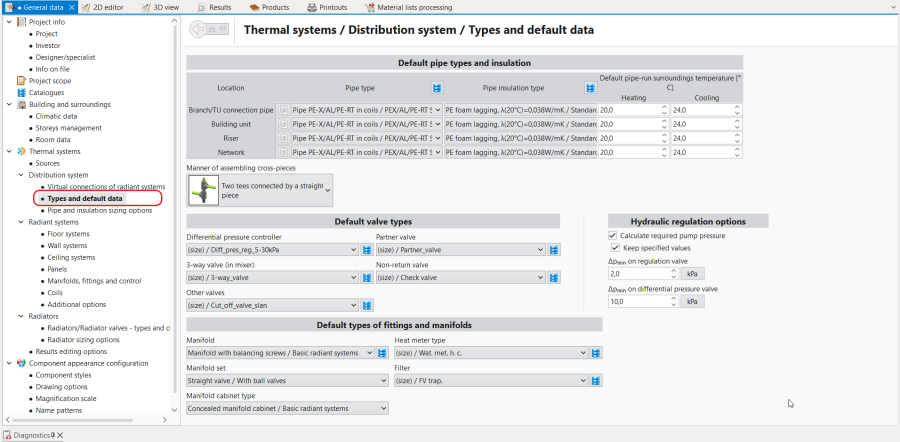
3. Distribution system / Types and default data.
- Thermal systems / Distribution system / Pipe and insulation sizing options – verify pipe and insulation sizing parameters.
- Thermal systems / Radiators / Radiators/Radiator valves - types and default data – append default types:
- Default radiator type,
- Default bathroom radiator type,
- Default radiator connection system,
- Default bathroom radiator connection system,
- Valve on supply rad. circuit pipes,
- Valve on return rad. circuit pipes,
- Default right side conn. radiator type,
- Default radiator connection system (right/left/middle conn.),
- Default valves for down-feed radiators - note proper application: for double-pipe system,
- Default radiator valve set - note proper application: for double-pipe system,
- Verify Common settings.
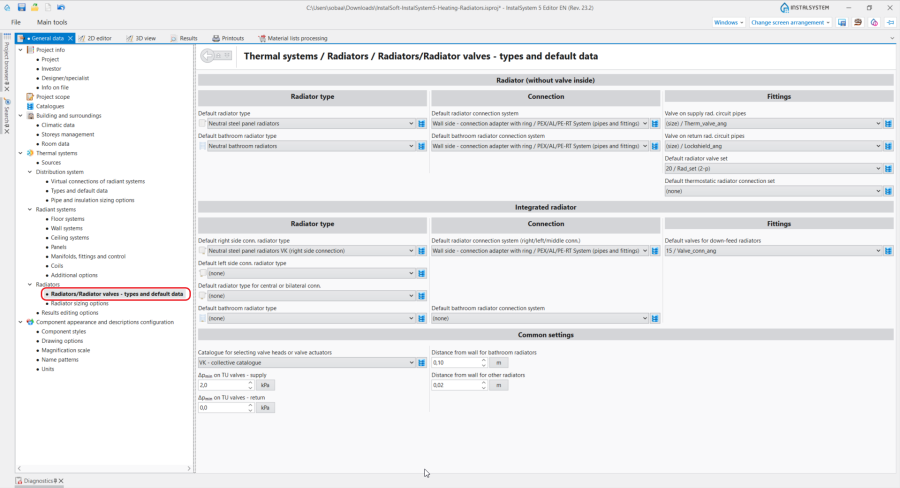
4. Radiators/Radiator valves - types and default data.
- Thermal systems / Radiators / Radiator sizing options – verify and append basic parameters for Bathroom and Other radiators:
- Default restrictions of radiator size (Default sizing method),
- Distance from floor and Distance from wall,
- Additions for radiator size,
- Radiator sizing options:
- Pay special attention to the Adjust flow rates function. If this function is active, the flow rate at the radiators will be calculated to obtain 100 % of the Required heating output in each room. If this function is inactive, calculations will be based on ensuring the Default temperature difference ( Δθs,H - Radiators) of the heating medium. In this case, the coverage of the Required heating output in the rooms will differ from the 100% value. For more information, see: How the function "Adjust flow rates" affects radiators thermal calculations,
- Change the manner of defining the Availability, if necessary:
- all delivery range,
- preferred,
- user tables - the ability to choose restrictions by unchecking particular folders.

5. Radiator sizing options / Availability.


Editing installation
Inserting and graphic editing of convective radiators
Carry out inserting and graphic editing operations using the AUTO and ORTO modes.
- Select editing scope Convectional.
- Insert multiple radiators under the windows / into recesses. This operation requires a created complete building structure. For more information, see: Preparation of building structure - Complete building structure.
Remove radiators from places where they are not intended. - Insert radiators manually at other locations.
Changing radiator Type, Connection type, direction of connection, Dimensions restriction
- If necessary, adjust the radiator Type, Connection type and direction of connection based on the location of the Riser and the intended routing of the pipes feeds. Use tools for marking multiple components.
- Adjust the position of Anchor - the point of the radiator that remains in the same place after the radiator has changed its length after being sized.
- Change the type of radiators to Trench convectors in the required locations and specify a negative value of Distance from floor (set in storey data).
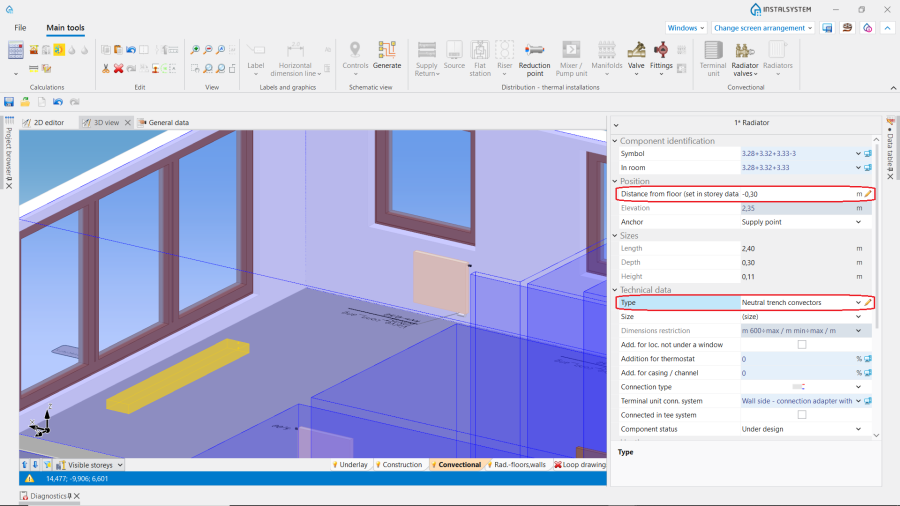
6. Trench convectors. - In case of necessity, change the Type, Connection type and other settings for bathroom radiators.
- If necessary, change Dimensions restriction in the Data table window for each particular radiator. Note: For Radiator sizing options "User specified" and "Smallest from range" the list with the radiators from the Catalogues is available.

7. Dimensions restriction.


Inserting and graphic editing of installation components
- Place Source and Riser components on the drawing.
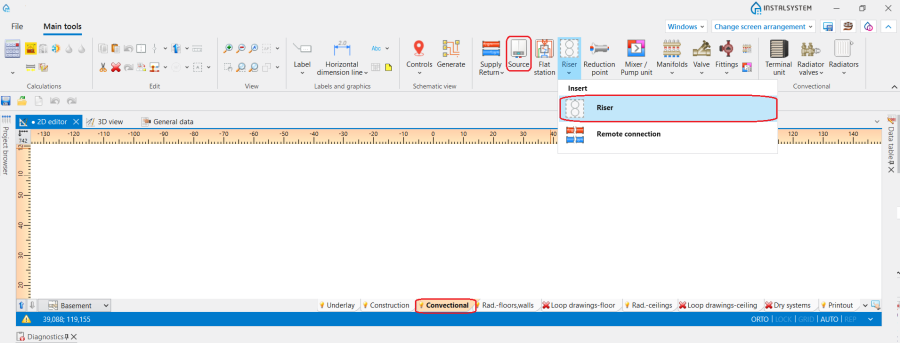
7. Source and Riser.
For more information, see: Connecting storeys with the Riser (Stack) element. - Сonnect Source and Riser using Supply and Return pipe-run pair with adequate spacing between. Place the appropriate Valves and Fittings.

8. Connect Source and Riser.


Connection of the convective radiators to the heating installation
Connection of the radiators to the heating installation can be realized in two ways:
- Connecting a separate branch directly to the Riser.
- Connecting to the Riser using Manifolds.
For more information, see: Manifolds, manifold sets and accessories.
Fittings
- Insert Valve on supply and return pipe feeds of non-integrated radiators and convectors. The shape of valves (straight/angle) has an impact on proper selection of radiator connections.
- Insert Radiator connection sets at the required radiator connection points.
Installation structure correctness verification
- Verify correctness of the installation structure with the Check connections function (shortcut: Shift + F2).
- Verify correctness of the installation structure on 3D view.
For more information, see: Verification of the correctness of installation structure.
Copying of repetitive part of installation to the next level
- If the layout of the rooms is the same on each floor, copy repetitive parts of the installation to the next level using Copy selected elements to the storey above function. Note that in this case Riser is automatically extended.
Hydraulic balancing of the installation
- If necessary, make hydraulic balancing of the installation by using Balancing valves and Δp controller. Note that Δp controller is inserted by default with a paired balancing valve.
Calculations and diagnostics
- Launch calculations by clicking the Heating systems icon
 in the Calculations section on the Main tools. Check and adjust errors and warnings in the Diagnostics window.
 - Using Find critical circuit/route function find the circuit with the highest pressure loss.

9. Find critical circuit/route. - Verify calculation results in the Results window:
- Heating terminal units,
- Heating/cooling circuits,
- Bill of materials - heating / cooling.
Every item of the installation presented in the result table can be found in active windows by using icon.
icon.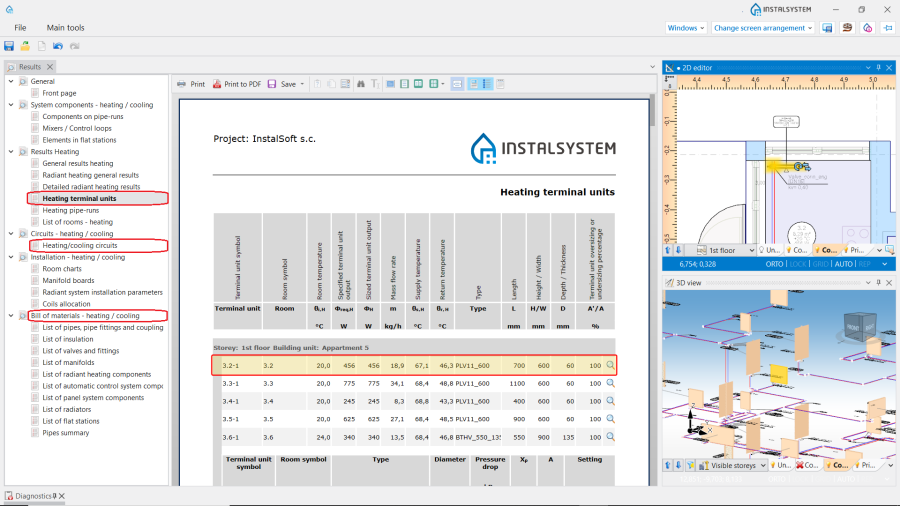
10. Verify calculation results.


Generating schematic views
The schematic view will be generated automatically. For more information, see: Automatically generate schematic views.

Preparing drawings for printing/exporting
For more information, see: Preparation of drawings for export/printing.
BIM - Export of the installation to an IFC model
Specify the required settings and execute export of the installation using the IFC file export icon on the Main tools bar in the Printout and export section when the Printout editing scope is active.

For more information, see: BIM - Export of installation and construction data from the project to IFC models.
| If you have any comments on this article, please send us a short message at info@instalsoft.com |
|---|